Sirius Tutorial 1: Working with small molecules
Step 1
Open Sirius application window. Then open Preferences in the Viewers menu. A panel shown below will be displayed.
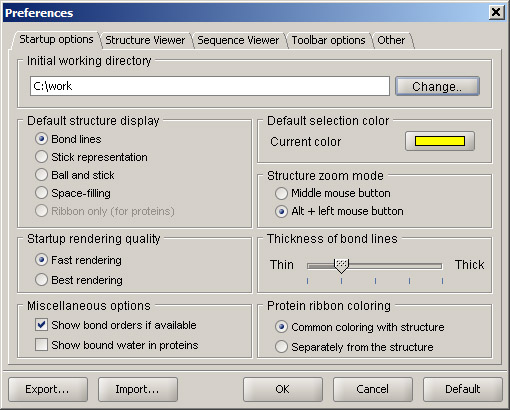
First, check what directory is listed as Initial working directory. By default, it points to the Sirius installation location. You can change it to your working directory by clicking Change button and browsing to the directory of your choice. Also, check the Structure zoom mode. In the 3D viewer, zoom in and out is performed by holding the middle mouse button and moving the mouse up (zoom out) and down (zoom in). Pressing a mouse wheel can be used instead of a middle button. If your mouse only has two buttons, check the option Alt + left mouse button. This way, you can hold the Alt key and use your left mouse button for zooming. It is recommended that the rest of the settings are left at their default values.
Step 2
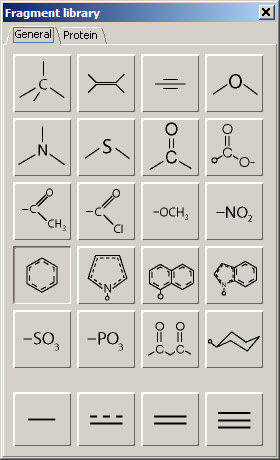
Load the builder panel by choosing Fragment library from the Builder menu. Fragment library has two tabs: General and Protein. The first tab shows fragments that are used to build basic chemical structures, while the second one is used to create and modify protein structures. In order to add a fragment to the 3D workspace, it must be activated by clicking its button (a benzene fragment is activated in the image on the right). Click anywhere in the 3D viewer area, and a structure of benzene will appear in the middle of the display. Now activate another fragment, oxygen (the last button in the first row). Click any hydrogen of the loaded benzene structure, and a hydroxyl group will be added. Next, select acetyl, which is the first button in the third row of the panel. Click the free hydrogen of the added hydroxyl, and the acetyl will be attached at that position. Activate the carboxy fragment (last button in the second row) and click one of the hydrogen atoms on the benzene ring next to the attached acetyl (ortho-position). The resulting structure still retains the name of the original fragment, in this case "benzene". When you click the structure in the 3D workspace, the status line at the bottom of the viewer shows which atom has been clicked. The format is as follows: structure_name:chain_id:residue:atom Deactivate the current fragment by clicking the carboxy fragment button. Note: if you have accidentally clicked in the blank space, the added free fragment can be deleted by selecting its name from the Close entry option in the File menu. |
|
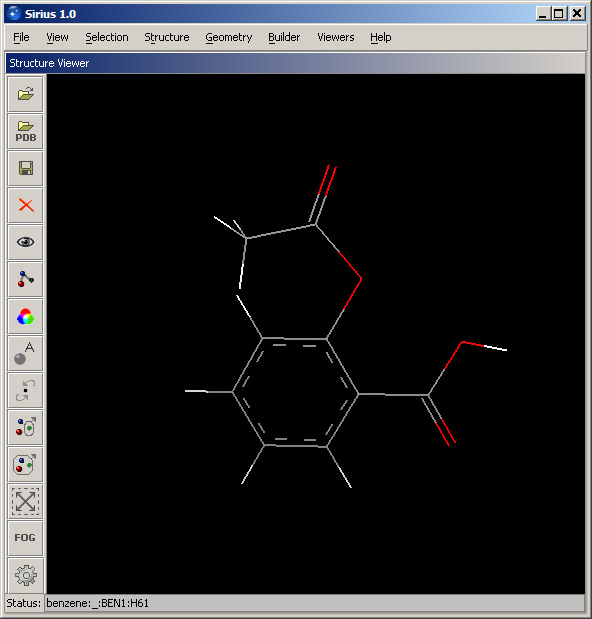
You have built a structure of aspirin (acetylsalicilyc acid). The display should look like the screenshot below. Rename the structure from "benzene" to "aspirin", using the Rename structure... option from Structure menu. Select "benzene" from the pulldown menu and enter the new name in the corresponding field.
Step 3
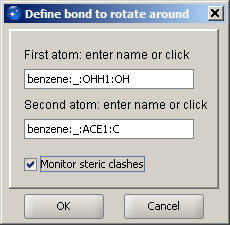
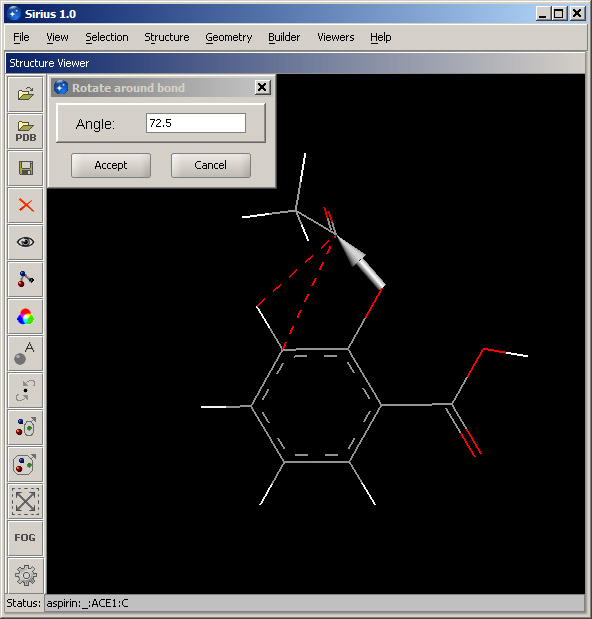
In the Builder menu, select option Rotate around bond... Once the dialog is displayed, move the structure toward the lower-right corner, so that it's completely in the view. Move it by pressing and holding the right mouse button and dragging the structure in the desired direction. We are going to rotate the acetyl group around the bond that connects it with the oxygen. To do that, we specify that bond by clicking first the oxygen atom, and second, the carbon atom of the acetyl group. The order is important - the benzene ring will remain stationary and the acetyl group will rotate. If the atom order is reversed, the benzene group will rotate. Next, select the checkbox "Monitor steric clashes". This way, we will be able to see whether any atoms are too close to each other. Click OK. |
|
Hold down the left mouse button and drag to the left or right in order to rotate the acetyl group. Red dashed lines indicating clashes (between atoms that are too close) will appear and disappear as atoms move closer or farther. Stop when the number of clashes is minimal (1). Click the Accept button.
Remaining red lines can be deleted by selecting Remove all markers from the Geometry menu. Alternatively, you may rotate around another bond - the one connecting the benzene ring and the oxygen atom, until red lines disappear completely and the structure will be free of steric clashes (screenshot in the Step 4 below).
Step 4
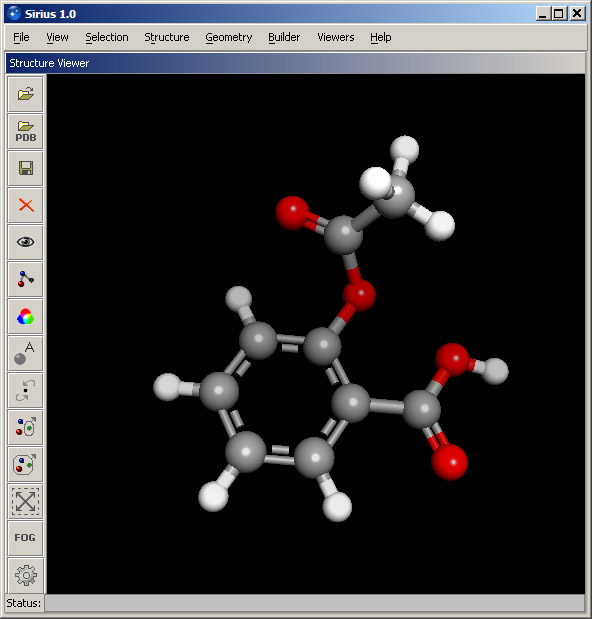
Select Structure rendering from the View menu. In the Structure objects panel, select Structure and either click the aspirin molecule in the 3D viewer or select its name from the pulldown menu at the bottom of the panel. Then select Ball and stick for Rendering style and set Rendering quality to Best. Then click OK. The result should look like the screenshot below.
Now select several atoms by holding the Control key, and select Color from the View menu. Leave the default choice "Currently selected" in the Structure objects panel, and pick any desired color from the palette on the right. If a different color is desired, you may click the Choose button and select a color from the full palette.

Selected atoms will appear colored in the selected color. You can experiment with different colors applied to different sets of atoms, as well as different rendering styles, which can be different for individual atoms.
Step 5
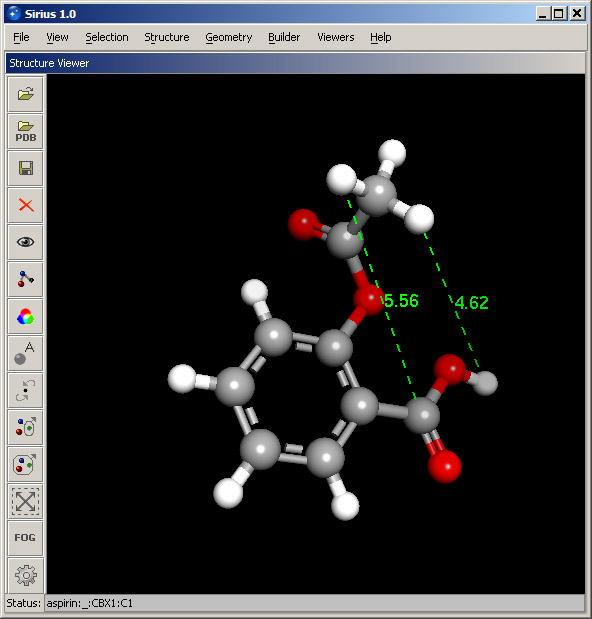
In Geometry menu, select Measure distance option. Then pick any two atoms in the structure and click OK. Distance between the selected atoms will be marked as a dotted line with the numeric value next to it. Set a distance for another pair of atoms. The resulting 3D display will look similar to the screenshot below.
Step 6
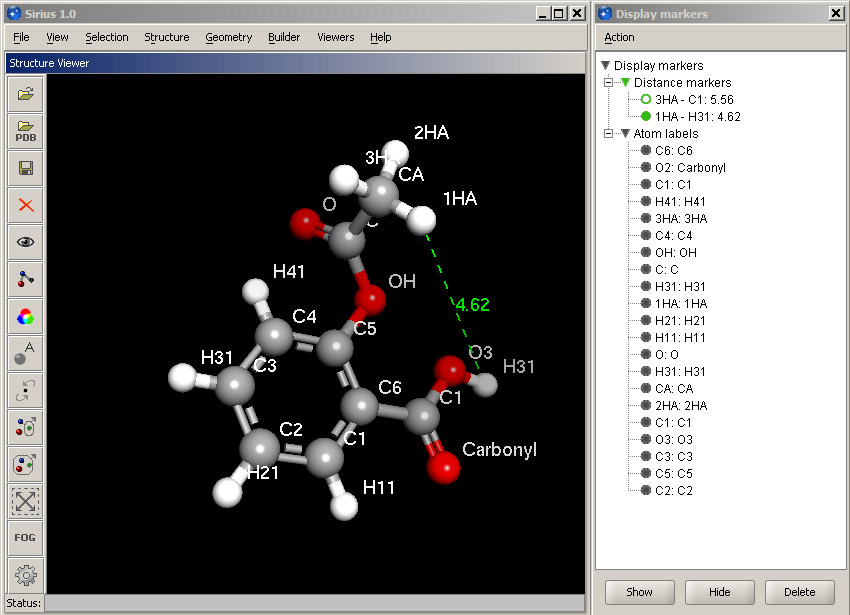
Individual atoms can be labeled. Select Atom labels option in the View menu and simply click OK. This will label every atom in the structure showing its name. In order to change the size or color of the labels, select Manage display markers option in the Geometry menu. The manager panel is used to manipulate any non-structure elements in the 3D display: distance markers, labels, hydrogen bond lines and steric clashes.
Expand the Atom labels and Distance markers headings. Distance markers are shown by the names of the atoms they connect, and the numeric value of the distance is given next to them. Atom labels are formed as follows: name:label. Since we have labeled atoms by their name, both parts are the same.
Select all atom labels by clicking the first one and then the last item while holding the Shift key. Then in the Action menu, select Set font size and set it to Large. The labels become bigger and more visible. You can revert to the default size by setting Medium. Select the oxygen of the carboxyl group of aspirin and choose Set label text from the Action menu. Enter "Carbonyl", and the label will change its appearance along with the corresponding marker in the manager panel.
Select one of the distance markers and click the Hide button in the lower panel. The corresponding distance line will disappear, and the icon in the manager panel will become empty.
To remove all labels and distance markers, select Remove all markers from the Geometry menu.
Step 7
To save the built structure, select Save structure from the File menu and navigate to the desired directory. Select PDB from the pulldown format list, enter "aspirin" in the name field and click Save. Open the save dialog again and this time choose MOL2 format for the saved file. Note: if you don't specify file extension, the correct extension will be added to the file name when it's saved.
Close the loaded structure by either of the three ways: choosing Close all entries, Close entry -> aspirin from the File menu, or by clicking the Close toolbar button on the left.
Open the file loading dialog by selecting Open from the File menu or clicking the opening button on the toolbar. Navigate to the directory where you saved the aspirin structure, choose mol2 from the format pulldpwn menu, select the aspirin.mol2 file and click OK. The structure will appear in the 3D workspace. It will look identical to the structure you saved. Now close the structure and load aspirin.pdb instead.
When t he structure appears in the 3D workspace, it's missing the partial double bonds within the benzene rings, because the PDB format (although frequently used) does not support partial bond orders. This problem can be fixed by opening the Fragment library and activating the partial double bond button (in the bottom row). Then click on each bond of the benzene ring, and the proper bonds will be restored.
Note that a new structure loaded in the workspace is drawn as lines. This is the default behavior, since it is much faster than rendering ball and stick representation, for example. However, if desired, it can be changed in Sirius preferences.
Step 8
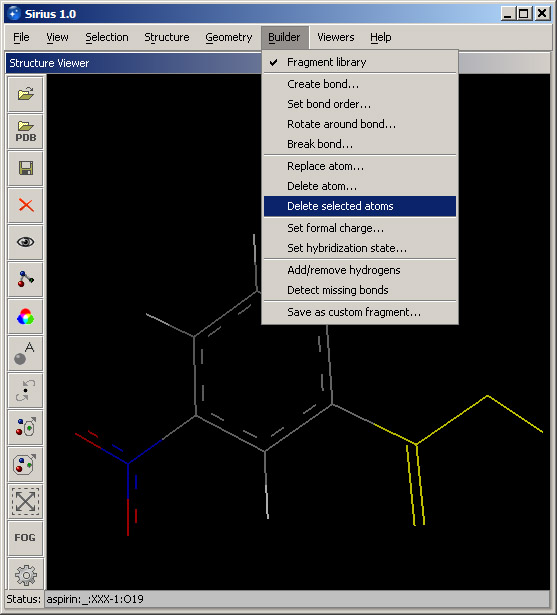
Sometimes, it may be necessary to build several related structures and conveniently save them together. This capability is provided by SDF format.With the aspirin structure open, modify it using the Fragment library: activate any fragment and add it to the structure. For example, a nitro group can be added. Then click the Save button in the toolbar or select the Save option in the File menu and choose SDF format for the new file. You can call the file "set1.sdf", for example. Save it. Next, select all atoms of the carboxyl group and choose Delete selected atoms option in the Builder menu. This will remove selected atoms from the structure.
One hydrogen in the structure is missing (where the carboxyl group was attached). To fix the structure, choose Add/remove hydrogens from the Builder dialog. This will open a dialog that you can use to specify which part of the structure should be analyzed for missing or redundant hydrogens. In this case, we can run the analysis on the entire structure, so leave the setting at Structure and select name of your structure (aspirin) from the pulldown menu. Click OK, and the missing hydrogen will be added.
Rename the structure to make sure it does not retain the name "aspirin" that it had at the time of loading. Name such as "mol1" will be sufficient. You can use "p-acetyl-nitrobenzene", but it may not be as compact as it is desirable.
Next, save the structure to the same SDF file you have created (set1.sdf) using the standard Save dialog. Choose the existing set1.sdf file in the dialog window or type its name. Then click OK. A dialog box will appear and will ask you whether you would like to append the new structure to the SDF file, overwrite it or cancel. Accept the default option and append the new structure.

Next, make any structural change you like and save the new structure to the same SDF file (make sure you accept the default Append option).
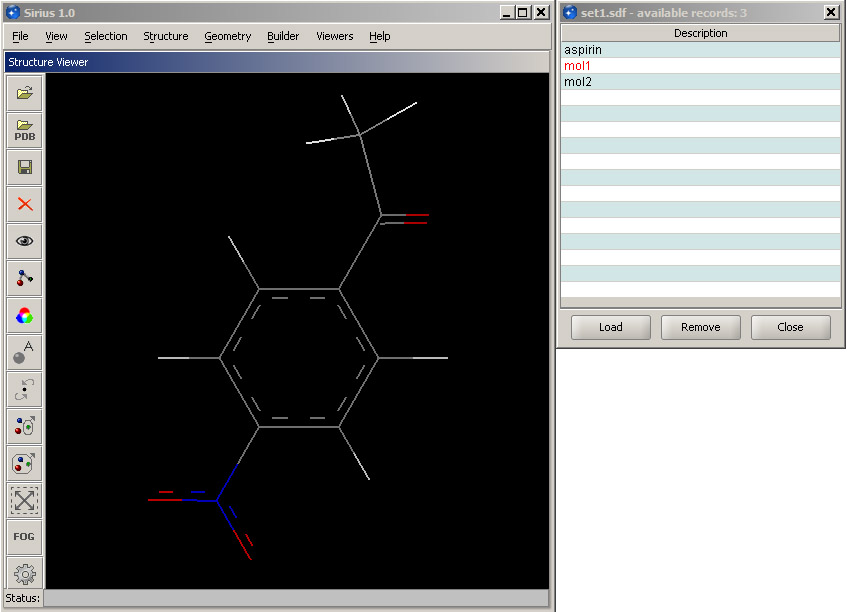
To view the saved molecules, first close any loaded structures. Then, in the open dialog, select SDF format and open set1.sdf. Since the file contains more than one molecule, it will display a panel with the list of the saved structures. You can select the structure you wish to open and click Load. The loaded entry is marked red in the list. A structure can be removed by selecting its entry in the panel and clicking Remove or by the usual mechanism in the main 3D workspace window.
© 2007 Regents of the University of California